
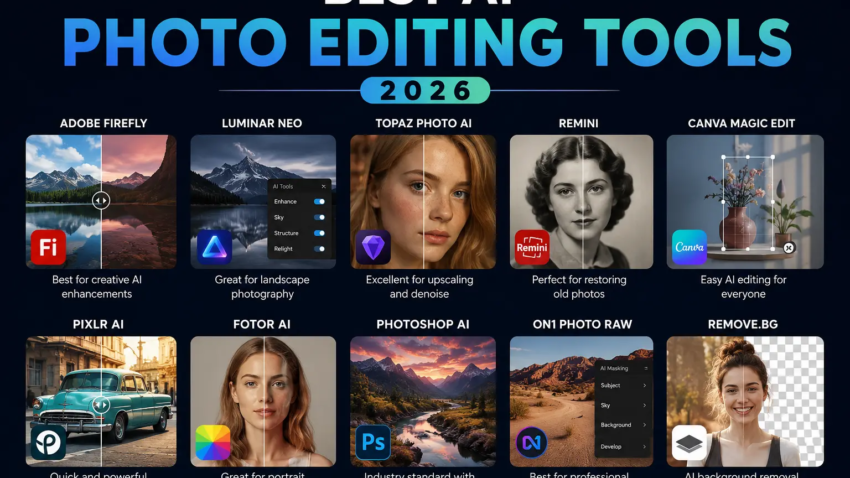
Best AI Photo Editing Tools in 2026 (Tested, Compared, and a Few Regrets Along the Way)
Last spring my cousin sent me 40 photos from her engagement shoot and asked, “can you just clean these up a bit before I post them?” Easy enough, I thought. Two hours later I was still fighting with a flyaway hair strand against a busy park background, trying to make a manual selection look natural in Photoshop. By photo 12, I was ready to throw my laptop into the lake she got engaged at.
That’s the night I actually got serious about AI photo editing tools instead of just poking at the “auto enhance” button and hoping for the best. A year of testing different apps, wasting a few subscription fees, and yes, ruining a couple of photos beyond repair, has taught me a lot about what actually works in 2026 and what’s just marketing fluff.
If you’re trying to figure out which tool deserves your money (or your free trial credits) this year, here’s what I’ve learned from actually using this stuff — not just reading spec sheets.
Why 2026 Feels Different From Even Last Year
I’ve been editing photos on and off for about a decade, and the jump in the last 18 months has genuinely surprised me. It’s not just sharper noise reduction or slightly better skin smoothing anymore.
Adobe rolled generative tools like Harmonize and Generative Upscale right into Photoshop, plus a built-in Topaz integration so you don’t have to bounce between two apps. Skylum added prompt-based editing tools called GenSwap, GenErase, and GenExpand to Luminar Neo, which basically means you can type “remove the trash can” instead of fiddling with a selection brush for ten minutes. Even Google’s Nano Banana Pro model now blurs the line between “generating an image” and “editing your actual photo” — you describe what you want changed, and it just does it.
The point is: the gap between “professional retoucher” and “person with a laptop” has gotten a lot smaller. That’s exciting, but it also means there’s a flood of mediocre apps riding the AI wave, so picking the right tool actually matters more than it used to.
The Tools I Actually Use (and Why)
1. Adobe Lightroom — for everyday photo management and color
If you take a lot of photos regularly — vacations, family events, your dog doing something photogenic — Lightroom is still the workhorse. The AI Denoise tool genuinely surprised me the first time I used it on a grainy nighttime shot from a concert; it pulled detail out of noise that I assumed was just gone forever.
The Lens Blur tool is another one I didn’t expect to like. It maps depth in your photo and lets you fake a shallower depth of field after the fact, which is handy when you shot something on a phone and wish you’d used a “real” camera.
Heads up though: a lot of the heavier AI tools run locally on your machine, so if your laptop is a few years old, expect some lag. I learned this the hard way trying to batch-process 200 wedding photos on an old MacBook Air. It took most of an afternoon.
2. Luminar Neo — for one-click drama and creative edits
This is the one I reach for when a photo is technically fine but just… boring. The Sky AI tool replaces flat, gray skies with something more dramatic, and it actually matches the lighting on the rest of the photo instead of looking pasted on. I was skeptical the first time — sky replacement tools used to look obviously fake — but the results held up even when I zoomed in.
What I appreciate most is that Luminar Neo sells a one-time license instead of forcing a monthly subscription on you. If you’re not editing photos every single day, that pricing model alone can save you real money over a year.
The downside: its photo organization tools are weaker than Lightroom’s, so if you’re managing thousands of files, you’ll probably want both tools rather than picking just one.
3. Topaz Photo AI — for rescuing photos you thought were unusable
I have a folder of old family photos that are blurry, grainy, or just poorly lit, scanned from a shoebox of prints my mom kept for 30 years. Topaz is the tool that’s actually brought several of those back to life. Its autopilot mode looks at the photo, figures out whether it’s noise, blur, or low resolution causing the problem, and applies the right fix automatically.
One genuine “wow” moment: I ran a tiny, pixelated photo of my grandfather from the 1970s through its upscaling tool and it recovered enough facial detail that we were able to print it for a memorial slideshow. That’s not something I expected from software.
Fair warning, it’s hungry on your hardware and it’s not meant to replace a full editor — think of it as a specialist tool you bring in for specific jobs, not your daily driver.
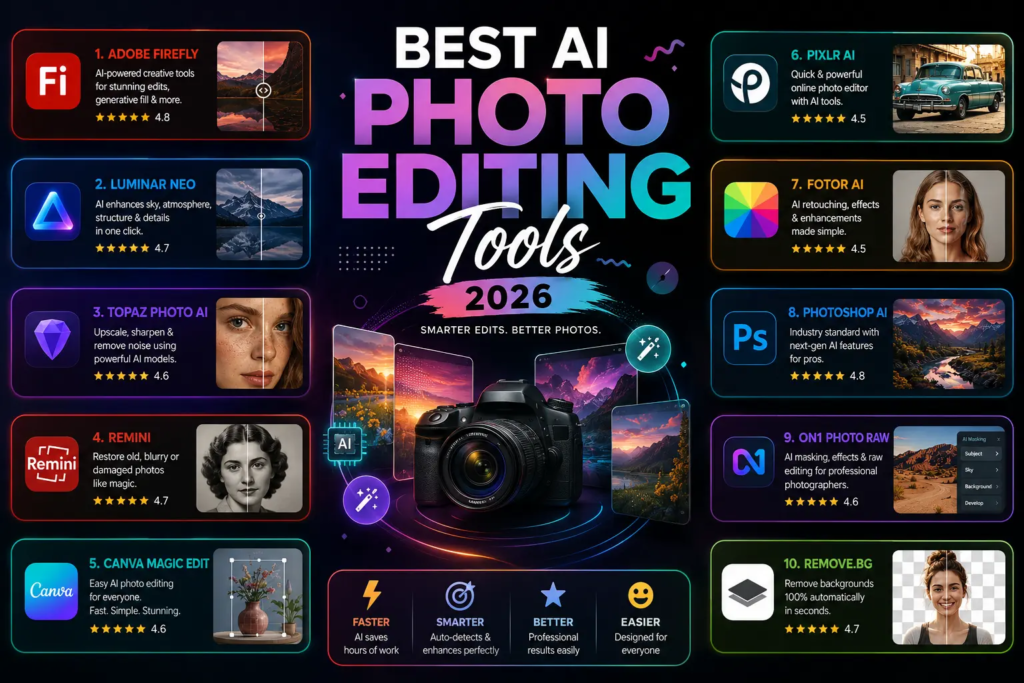
4. Canva and Pixlr — for quick, free, no-fuss edits
Not every photo needs studio-level treatment. Sometimes you just need to crop something, remove a background, or brighten a photo before posting it to Instagram in the next five minutes. For that, Canva and Pixlr’s free AI tools are honestly good enough, and they run in your browser, so there’s nothing to install.
I use these constantly for quick social posts where perfection isn’t the goal — speed is.
Step-by-Step: How I Actually Edit a Photo Now
Here’s roughly the workflow I’ve settled into after a lot of trial and error:
- Cull first. Before editing anything, sort through your shoot and pick the keepers. Tools like Aftershoot can do this automatically by detecting closed eyes, blur, and duplicates, which saves a ton of time if you shoot in bulk.
- Fix the technical stuff first. Run noise reduction or sharpening (Topaz or Lightroom’s Denoise) before you touch color or style. Trying to color-grade a noisy photo just makes the noise more obvious.
- Do the structural edits next. Sky swaps, background removal, object removal — anything that changes what’s actually in the frame. Get this right before fine-tuning color, because these edits can shift the lighting balance of the whole photo.
- Finish with color and mood. This is where presets, filters, or manual adjustments come in. I usually do this last because it’s easier to judge the final mood once the technical issues are out of the way.
- Zoom in before you export. Always check generative edits at 100% zoom. AI-generated pixels can look perfect at thumbnail size and slightly off when blown up — especially around hair, fingers, and reflective surfaces.
Mistakes I’ve Made So You Don’t Have To
I trusted “auto enhance” too much on portraits. Early on, I let an AI skin-smoothing tool run at full strength on a friend’s headshot. It looked airbrushed in a weird, plasticky way that nobody noticed until we printed it large for a banner. Lesson learned: dial back AI skin retouching sliders to maybe 30-40% of what the tool suggests by default.
I didn’t check the privacy policy before uploading client photos. Some cloud-based AI editors use uploaded images to train their models. For personal photos that’s mostly fine, but if you’re editing client work, especially anything sensitive, check whether the tool processes locally (like Lightroom and Topaz mostly do) or uploads to a remote server (like most browser-based tools).
I assumed every AI tool handles hair and fur well. It doesn’t. Hair, fur, and anything transparent like glass or sheer fabric are still where most AI cutout and background tools struggle. If you need a flawless cutout of someone with a lot of stray hair, budget extra time for manual touch-ups, or consider a human retoucher for that one tricky shot.
I forgot AI editors aren’t the same as AI image generators. ChatGPT and similar chatbots can sometimes nudge brightness or contrast if you ask nicely, but they’re not built for actual photo editing and the results are inconsistent. If you want reliable edits, use a dedicated photo editor, not a general chatbot.
A Quick Reality Check on Pricing
Most tools fall into one of three pricing styles, and picking the wrong one for your situation can quietly cost you:
- Subscription (Adobe, Aftershoot) — predictable monthly cost, but you pay even in months you barely edit anything.
- One-time license (Luminar Neo, often Topaz) — better if you edit seasonally or don’t want a recurring bill.
- Credit or pay-per-image (some cloud tools) — fine for occasional use, but can sneak up on you fast if you’re editing a 1,000+ photo wedding gallery all at once.
I switched from a per-image tool to a flat-fee one after realizing my “cheap” pay-per-photo app had quietly cost me more than a Lightroom subscription over three months. Do the math based on how many photos you actually edit, not how the pricing page makes it sound.
So, Which One Should You Actually Pick?
Honestly, it depends on what you’re doing:
- Casual social media photos — Canva or Pixlr, free tier is enough.
- Regular photography work, lots of files — Lightroom, paired with Topaz for the tough cases.
- Creative, dramatic edits without a subscription — Luminar Neo.
- Rescuing old or low-quality photos — Topaz Photo AI.
There’s no single “best” tool, no matter what a headline promises. What actually matters is matching the tool to how often you edit, what kind of photos you’re working with, and how much manual control you want versus how much you’re happy to hand off to the AI.
If there’s one thing I’d tell my past self before that engagement-photo disaster: try the free trial on two or three tools with your own messy, real-world photos before committing to anything. The marketing demo photos always look flawless. Your actual photos — with bad lighting, stray hairs, and that one person blinking — are the real test.

Hamad Arshad
SEO Specialist | SEO Manager | GEO Strategist
7+ Years of Experience in SEO, GEO, AEO, AI SEO, Local SEO, Technical SEO, PPC, Google Ads & Meta Ads.








Leave a Reply